In this final chapter of Tales of Symphonia, we'll tackle the remaining dungeon, side-quests, monsters, items, titles, recipes, and skits for us to obtain. Before starting out, make sure you've viewed the scene in Vinheim before the warp point that leads to the final battles; seeing it is required for some of the following to become available.
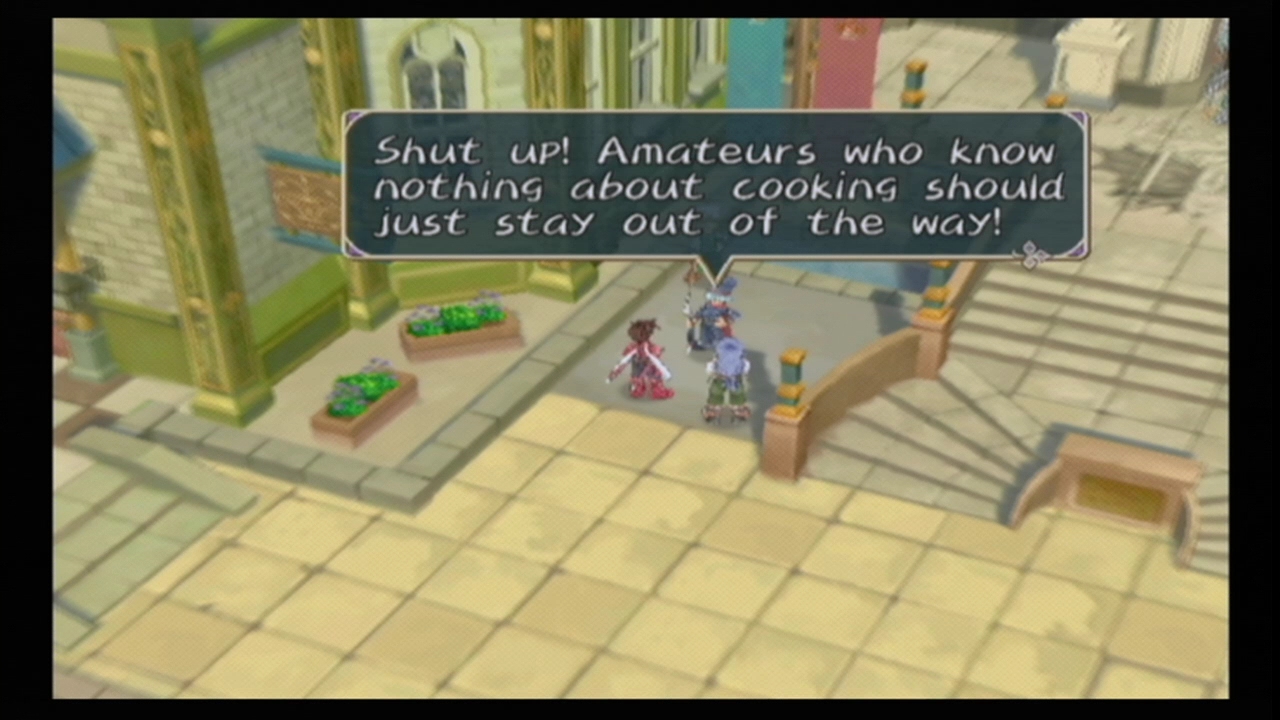
We'll start the last chapter in Meltokio. If Kratos is in your party, swing by the inn and rest to view the skit "Welcome Back, Kratos". Afterward, near the stairs in the courtyard of the castle, look for a confrontation ongoing between the Wonder Chef and a menacing "Dark Chef". Obviously part of the Black Dragon Clan, this Dark Chef is threatening the Wonder Chef to hand over his "ultimate recipe". Lloyd and Regal approach the situation and the Wonder Chef rebukes his dark doppelganger and vanishes. The Dark Chef then indignantly challenges Regal to a cook-off! He even gives him the Beef Stew recipe. When cooked, Beef Stew recovers the party of all status ailments. Regal soundly defeats the Dark Chef (Despite the obvious bias judges), and earns the recognition of the actual Wonder Chef bestowing upon him the costume title of God of the Kitchen.
Regal's God of the Kitchen costume. Acquisition of this title will allow us to pick up the remaining three recipes we are lacking. It also boosts Regal's affection with Lloyd.
Remaining in Meltokio, enter Tethe'alla castle and proceed down into the dungeon in the western-wing. Regal will ask one of his former cellmates as to the location of a man named Levin whom taught him how to fight with only his feet. He's retired to the Hot Spring, apparently, and Regal will ask Lloyd if they can stop and visit him. Answering "You bet." largely boosts Regal's affection with Lloyd and is required to continue the event. If Lloyd declines, it has no effect on Regal's affection, but you will not be able to obtain Regal's best weapon! Needless to say, you don't want that!
With the God of the Kitchen title, put Regal in the lead of your party (Doesn't have to equip the title) and fly over to the Meltokio area's House of Guidance. Talk to the chef just inside the building and he'll be inspired to teach Regal the Pork Cutlets recipe. Pork Cutlets will recover a huge amount of HP for the entire party when prepared.
Having agreed to stop by the Hot Spring for Regal, go there next; northwest of Meltokio. Beside the spring itself is Regal's master, Levin. The two will converse on the matter of Regal still refusing to his his hands to fight and whether this is a burden to his friends (Maybe a little?). After the scene, if Regal is at least level 80, talk to Levin again and he'll gift Regal the Dynast weapon: his best in the game at +920 Attack and +18 Defense. Regal also receives another boost in affection for Lloyd.
Our next stop is the Grand Tethe'alla Bridge, and take my advice: have something nearby you can break instead of your controller! Entering from the Meltokio end, decline to use the quick jump to find this sub-human Sea-Katz loitering about. We gotta play his God-forsaken Red Light, Green Light mini-game now.
Once Genis commits to play, the Sea-Katz summons the
Children of the Corn. These vile miscreants don't care about winning: only trying to collide with Genis and knock him backward; with one success almost guaranteeing your loss. Thankfully, if Genis is automatically placed on the outer-rim of the Bridge, there is less of a chance the demons will get him, but it's entirely random. Don't bother with any of the fancy side-movements, just mash the A button as quickly as you can and hope you stay a step ahead of the little devils. Of course, you need to stop pressing A just before the Sea-Katz calls out "Red Light" and turns around or you'll be sent back to the start.
The good news is there is actually a glitch we can employ to give us a slight edge! Genis can gain an extra step by, in conjunction with still hitting A, you press the Start button right as the Sea-Katz turns around. The dialogue box that appears will prevent the Sea-Katz from catching Genis who is still moving, but it requires a bit of practice. You can alternate the A and Start button presses to occasionally freeze the other kids in their place, too, which is particularly useful if you fall behind in the third round, but I personally find this awkward and hard to do and only use it as a last resort. I wish there were some more tips I could provide, but in a lot of ways success comes down to luck and successful implementation of the glitch. It took me over 20 attempts here.
Managing to survive through three consecutive rounds wins Genis his best weapon in the game, One World, and he will also be granted the title of Strategist (Str: 30%, HP: 20%). Once you maximize Genis' Intelligence at 999, however, the Phantasmagoria from the Luin weapon shop with its +20 Defense is a much better option, in my opinion.
Note: You will only receive the One World if you complete this mini-game after obtaining the Derris Emblem in Derris-Kharlan. Doing so before is a waste of your time (and hair).
Mizuho is the next destination for us. If Sheena defeated Kuchinawa in the duel and has obtained the Successor costume title, talk to Chief Igaguri now and he'll hand the Kannazuki armor over to Sheena. Her best defensive armor by +6 over the Shaman Dress, it provides additional defense against wind-based attacks, however, losing the much-more beneficial light and dark-based defense of the Shaman Dress makes the Kannazuki being better questionable. My personal opinion is the Shaman Dress is slightly better, but you decide for yourself if the extra Defense of the Kannazuki is worth it.

Skip across the pond to Ozette. If Presea has reached a minimum of level 80, there will be a man standing beside her father's grave. Named Ralph, he was a former compatriot of Presea's father, Sieg, in the Papal Knights. He explains that Sieg developed, and taught, a technique so powerful it drove the Papal Knights to become obsessed with power. Regretting his actions, he retired to become a woodcutter in the forests of Ozette. He'll ask Presea how she believes that Sieg was able to overcome the darkness in his heart, but your response makes no difference in affection.
Talk to Ralph again afterward and he'll give Presea her best weapon, the Gaia Cleaver. It has 999 attack power, but is inherently earth-based, which isn't a bit deal since a lot of her techs are earth elemental anyway. If you want to change the element, simply equip one of the Summon Spirit accessories. Before leaving the screen, equip the Gaia Cleaver to Presea and talk to Ralph again to score a second one!

Move to Altessa's House next. He's finally recovered from Mithos' attack and offers to customize accessories to help the party. Available are a load of great, rare ones, but you'll need to do a lot of item collecting and going back and forth between he and Dirk's House to make them. Of particular note is the Elven Cape accessory that cannot (Reasonably) be obtained anywhere else in the game; although it's of little use at this point in the game. Toward the end of the chapter I will cover Altessa and Dirk's shops in more detail to help put together everything you may need for your characters.
Fly the Rheairds to the House of Guidance that is directly east, over the mountains, from the Latheon Gorge. Put Regal in the lead of your party and talk to the chef sitting in the pew. Having obtained the God of the Kitchen title, he'll teach Regal the Potato Salad recipe. It recovers a large amount of TP for the entire group.

Our tour takes us to Heimdall in the Ymir Forest. The residents have returned, but are fewer in number, and all of the amenities, including the inn, are unavailable except for the Katz service. If you're looking for the Rune Cape or Boots that were for sale here, Altessa has them available to customize now. The +10 Intelligence Rune Cloak armor you can still purchase in Flanoir, also, to note. Stroll over to the eastern-end of town for a scene with Genis to automatically take place. A full-blooded elf boy will disrespect Genis, despite the fact he and Raine helped save their village, and challenges him to a magic duel. Genis declines due to the current nature of the world. The boy's master,
Crowley, apologizes for his behavior and then teaches Genis the spell Meteor Storm. This thing will absolutely devastate the entire battlefield when cast. You would also think that after what happened to their village nobody would want to use this spell anymore! Genis also obtains the title of Mana Master (Int, Eva: 50%, TP: 30%, Acc: 20%).
Note: Regarding Mana Master, in the Status menu, it shows a 30% Evasion increase (Equal to Study Harder!) but the actual percentage is 50% from the game's code.
On the western-side of the village, if you picked up the Sacred Stone item in Vinheim, talk to the man roaming around the south of the entrance to the Torent Forest. He tells the group that during the evacuation of Heimdall earlier, many priceless books were stolen, including one, supposed cursed, dealing with the story of the Underworld, Niflheim. He goes on to say that the book must be burned, but not only is the book lost, but the necessary Sacred Stone is, too. Good thing we swiped that from Mithos' coffers. While not necessary to see this scene, it hints of the upcoming bonus dungeon.
If Kratos joined your party, enter the half-destroyed Elf Elder's house and talk to him for a scene. Afterward, we need to exit Heimdall travel to Sylvarant next.
In Sylvarant now, once again, if Kratos is part of the group, stay at the Triet inn. That night, there will be a scene between Lloyd, Kratos, and Noishe that furthers expands upon the trio's relationship and Noishe's origins. The scene in Heimdall where the party learns the true species of Noishe may be required to view this, but I'm unsure.
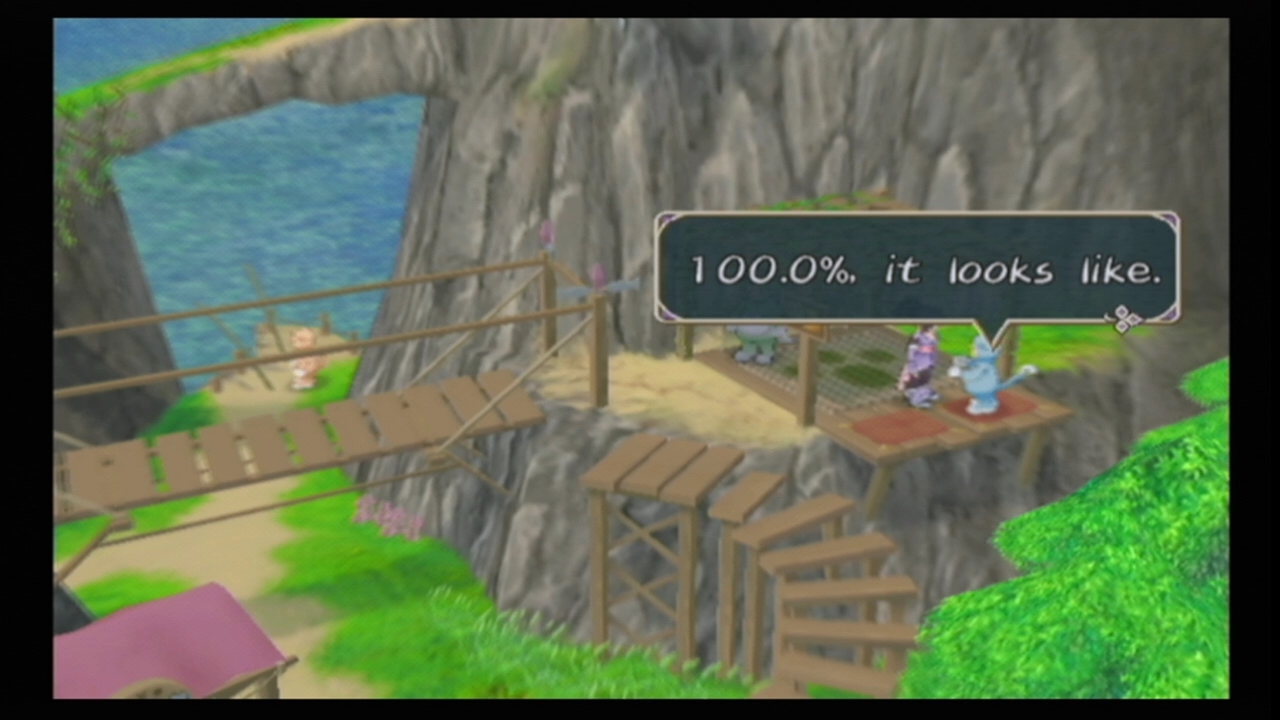
Fly to the northwestern continent and enter Katz' Village. Put Sheena into the lead of the party and have her talk to the blue-suited Katz inside the "inn". If you've been following the guide from beginning-to-end, you will have opened 100% of the world's treasure chests and Sheena will be rewarded the title of Treasure Hunter (Int: 100%, Str, Def: 50%). If you already have the title, it will not be rewarded to you again, to note. If you don't have 100%, there's a chance you can use the Katz services in the various cities to try to find missed items for you (Some, but not all, they can even find from now-inaccessible dungeons). Hopefully you don't have to resort to this, though.

For yet another Kratos scene, make a quick stop in Luin. Examine the plaque in front of the water fountain housing the statue of Lloyd for a great scene where a huge, unknown connection is drawn between Kratos, Lloyd, and the city of Luin. This boosts Kratos' relationship with Lloyd and is the final affection event in the game!
Nearby Asgard is our next destination. With Regal in the lead of your party, talk to the chef standing outside the inn to the right of the path that leads north to the dais. Having obtained the God of the Kitchen title, he teaches Regal the final recipe in the game: Paella. This recipe will boost all character's Physical Attack/Defense, Magic Attack/Defense, and Accuracy temporarily for the next battle (Cooked by Genis). With all the recipes obtained, you can start receiving special titles from the Wonder Chef in Altamira once a character has mastered all of the recipes. More about this a little later.
Next, drop by the House of Salvation near Asgard. Talking with the girl on the second floor begins a word game between her and your lead character. Each time she asks to stop, refuse, and at the conclusion she'll give you a Spirit Bottle, but only the first time.
South down to Hokonesia Peak now. Koton has found a rare piece of armor that he's willing to sell the party. Cough up the Gald and you'll receive the Kratos/Zelos-only Golden Armor; their best in the game. In addition to great defense, it comes with protection against water, wind, fire, and light-based damage.
Note: If you neglected to give Koton the Spiritua Statue near the game's start, he will not offer to sell you the Golden Armor and it is missable.
Make a quick stop in Iselia to see the skit "Corrine is Calling Me" pop-up. Then, pivot over to the Martel Temple for a scene at the entrance. Sheena swears that Corrine is somewhere inside. Warp into the room where Colette first met Remiel and Corrine's Bell (Stays in your inventory) will begin to move on its own and shatter! Corrine has been reincarnated as the Summon Spirit of Heart, Verius. This scene has no bearing on anything, but is a nice touch for a final farewell for Sheena and Corrine.
Note: Sheena must have obtained the Successor costume title in order for the skit and scene to be available.

Enter Iselia Forest from the entrance nearest Dirk's House. You'll notice all of the monsters are gone from the screen and the Sword Dancer's skull is looming about. It's time to challenge him to the third, and final, battle. Of course, if you haven't defeated his two previous forms, this form is unavailable. Form a party of Lloyd, Colette, Raine, and Genis, as is my general recommendation for the Sword Dancer. Equip Lloyd (Or any melee fighter you prefer) with the Topaz accessory to take advantage of the Sword Dancer's continuing weakness to light. You can give Kratos/Zelos the light elemental Laser Blade, too, if you want, but not necessary. If you're a lower level, you may want to give your fighters a Blue Talisman and/or Defense Ring since the Sword Dancer is as viable a physical threat as ever. Unfortunately, it's as equally deadly with magic now, too. Particularly, he will frequently cast Indignation and Spark Wave, so the Reflect Ring, Thunder Cape, Paralysis Charm, and Sardonyx accessories are nice to equip, as is the Rare Helm for Lloyd and Kratos/Zelos. You can cook Paella for a jump-start, also.

Version three of the Sword Dancer, while still possessing deadly physical attacks, has reverted to much more of a spell caster now. While most are mid-level ones, like Spark Wave, Ground Dasher, and Flame Lance, don't underestimate them as their frequency can present big problems for the party. It's also got the familiar, but still lethal Indignation in its arsenal; thus the main reason for thunder protection. Like usual, Indignation is fairly easy to backstep out of if you are paying attention, but you'll need to carefully command an AI controlled character to Guardian before the spell hits them. Without resistance, Indignation is almost guaranteed to knock the character out. Save your Unison Attack for when it begins to glow purple, signalling the possibility of casting Indignation, and you can knock him out of the spell. Speaking of Unison Attacks, like the past battles, you can deploy a couple of light-based special attacks to deal massive damage to the Sword Dancer. If Genis and Raine are both on the Technical line, use a Unison Attack
combining Ray and Ground Dash/Cyclone to activate the devastating Prism Stars compound tech for MASSIVE light damage.
You'll need a physical fighter, like Lloyd, to run interference on the Sword Dancer and absorb its powerful physical attacks. Make sure Raine casts Field Barrier/Permaguard and also Acuteness/Keenness on any you bring; Guard/Flare Bottles are a good idea, also. Besides healing, have her consistently toss Photon or Holy Lance at our light-deficient adversary. If Genis happens to be on the Strike line, he can cast Prism Sword for major damage, otherwise, Meteor Storm or Indignation. Colette can contribute with Holy Song and Angel Feathers or Judgment, or you feel brave, try to swipe another EX Gem Lv3. Remember, also: If you bring Sheena, she can enchant a character's weapon to being light-based with S. Seal: Light. The final variation of the Sword Dancer has a lot of HP, but stay consistent with your healing and defense and it will fall in due time.
Finally fulfilled in his lust for battle, the Sword Dancer vanishes and you receive the Kusanagi Blade weapon for Lloyd; physically, his most powerful, at +930 Slash and +850 Thrust. When using the Eternal Swordsman title, I still prefer the Material Blade to activate Falcon's Crest, but if using another title, there's little reason not to equip the Kusanagi Blade for Lloyd's weapon. You'll also automatically activate the skit: "Elite from the Underworld Take Three" having put the Sword Dancer to rest for good.

Let's return to Tethe'alla now and land on the roving village of Exire. Remember that Maxwell earlier wouldn't give us the time of day, but having formed a pact with Origin and our entire party of eight back together, it's a bit more receptive of our power. If you didn't come here earlier for the scene with Maxwell, the location of Maxwell's monolith is found via a hidden path behind the man's house who knew Raine and Genis' mother, Virginia, as seen in the screenshot above. To call Maxwell, you'll need to equip the Ruby, Aquamarine, Garnet, and Opal accessories on any of your characters; active or not, however, if you already did this once, you won't have to do it again.
Unsurprisingly, Maxwell is a magical powerhouse, with his most powerful spell being the non-elemental Meteor Storm, so there's little you can do to protect against it with equipment. Besides Meteor Storm, his most dangerous spell is probably Thunder Arrow, but additional protect is not entirely necessary. The Rare Helm for Lloyd and Kratos/Zelos and Sardonyx and Thunder Cape accessories are useful if you want to be extra careful, however. Cooking Paella beforehand is a great idea, too.

If you can survive Meteor Storm, this battle is easier than the previous Sword Dancer one, but at a lower level, it can potentially wipe out your entire party in one casting. When Maxwell unleashes it, immediately open the menu and command each
character to use their Guardian tech to try to minimize the damage. Raine and/or a large supply of Energy Tablets is highly recommended to recover what is left of the party afterward. Thankfully, in my experience, he tends to wait a while before casting it again. Your best defense in this battle is offense: have everyone blitz Maxwell physically. The wizard can be staggered rather effectively with sustained combos and kept from casting his magic. Have Raine cast Acuteness/Keenness, Colette use Holy Song, or down Flare Bottles to increase your damage. Anti-air techs such as Lloyd's Tempest set and Regal's many aerial ones are extremely useful here. Besides Meteor Storm, the rest of Maxwell's offense is mostly average at best (You can backstep out of most of his spells), so if you can adequately survive and recover from his raining rocks, he can be subdued in time.
Maxwell drops the best armor in the game for Raine: the Spirit Robe. It provides protection against all eight elements with +60 Defense!
The old wizard will then form a pact with Sheena and she gains the Summon: Birth tech. As you might imagine it does, it basically casts a version of Genis' Meteor Storm when used during Overlimit while raising the party's magic attack temporarily. Sheena is also bestowed upon the title of Master Summoner (Int: 50%, Acc: 40%, TP: 30%) for having learned all of the Summon techs available. Proof of the pact nets one of the best accessories in the game: the Turquoise, as well. Don't confuse this with the Diamond accessory as the Turquoise is mislabeled as belonging to Origin in the menu. Equipped, the Turquoise grants the effects of both the Holy and Spirit Symbols; allowing large HP/TP regeneration, and is fantastic for any character you choose, but I prefer Sheena. Outside of Exire, look for the skit "Pact with Maxwell" to occur, too.
We're needed at the Coliseum in Meltokio for the next challenge. Having been through Vinheim, new opportunities have been unlocked here. Hopefully, especially if you got Kratos, you already played through the three Single rounds with Zelos before he left the group. Since I already covered the battles, for the most part, over in
Chapter 21, I will refer you to there for battle strategies, however, I will have some new recommendations for equipment and playing with specific characters after some basic information.
New Monsters at the Meltokio Coliseum (Singles): Sasquatch (Intermediate), Dragon Knight (Advanced)
There are two new monsters that are added to the Monster List from the Singles matches, but since items are not usable, their details are automatically filled out, however, you will need to get the Sasquatch to drop its item. Speaking of the Sasquatch, when playing as Raine and Genis, you may want to equip the Krona Symbol or Yasakani Jewel to protect against its ability to Curse and lock your tech usage.
The first time you complete a class, you'll get a one-time reward. Beginner gets you 12,000 Gald and a number of Elixir, Miracle Bottle, Miracle Gel, Pineapple Gel, and Lemon Gels. For Intermediate, you'll be rewarded 26,000 Gald and a "Red" variety of statistical-boosting items. Lastly, finishing Advanced gains you a Krona Symbol accessory and 40,000 Gald. Each additional time you complete a class, you'll get the stated Gald reward and a single Elixir, Miracle Bottle, Miracle Gel, Pineapple Gel, and Lemon Gel. The Arena is the only place in the game to infinitely obtain the HP/TP recovering Elixirs, also. I recommend you stock 20/30 Elixirs for upcoming bosses.
Note: Be warned: The first character you complete Advanced Class with will be challenged to a rematch with Seles! Also, in the single matches, when Lloyd enters, the character with the
highest affection for him will cheer him on before he goes out to fight.
Subsequently, Lloyd will encourage his highest affection character when
they enter, too.
Half of the party should have little problem completing the Advanced Coliseum, however, Colette, Raine, Genis, and perhaps, Regal, can present some problems. Below, I'll give some recommendations that will hopefully help more along with the ones in
Chapter 21. Having Paella or Miso Stew set as your recipe is a nice addition, as well.
Lloyd, Kratos/Zelos, Sheena: Turquoise as their first accessory, Elven Boots if not using the Dash EX Skill, or either Yata Mirror (Extra Regen) or Blue Talisman (Defense) if you are. Sheena should have the Kannazuki armor and the Star Bracelet and Elemental Circlet for fire protection. Mystic Symbol for Kratos/Zelos may be considered, also.
Colette: Turquoise and Yata Mirror for accessories; Elemental Circlet for headgear. If she's on the Strike tech line, you can simply Torrential Para Ball everything to death and keep your distance while your HP/TP regenerates heavily. On the Technical line, at a distance or against the huge Dragon Knight, use Hammer Rain or Stardust Cross, and Triple Ray Thrust at closer range. Whatever you do, DO NOT use her basic attacks or you'll find yourself in some trouble quickly. Setting her EX Skills to: Eternal, Resurrect, Stat Boost, Angel Song, to activate the compound EX Skill, Angel's Tear, that will automatically revive her once per battle can be very useful, as well.
Genis/Raine: Turquoise and Protect Ring for accessories. Star Cap/Circlet and Bracelet for the fire protection. The only way Genis and Raine have a chance here is the compound EX Skill, Concentrate, that prevents the enemies from interrupting their magic. Genis' EX Skills to create Concentrate are: Rhythm, Speed Cast, Spell Save, and Spell Charge. Raine's combination is: Speed Cast, Item Pro, Spell Save, and Happiness. If you're over level 100, you might get away with using the Mystic Symbol instead of the Protect Ring. Raine can cast Barrier on herself, too.
Presea: The little lady will, arguably, have the easiest time here. Turquoise and Elven Boots for accessories and the Star Gauntlet. Set her EX Skills to: Vitality, Endure, Guard Plus, and Revive for the compound skill, Glory. Glory will prevent most enemy attacks from being able to stagger her and she can consistently pummel away.
Regal: Turquoise and Elven Boots for the accessories, again. Star Cap and Bracelet for the fire protection. Regal, also, has the Glory compound skill he can activate with: Vitality, Guard Plus, Guilt, and Flash. Regal's problem is, essentially, how clunky he controls. To simplify things, regardless of which side of the tech line he is on, chain Crescent Dark Moon into his Wolverine tech, and with Glory, the enemy will be unable to interrupt his combo! Keep an eye on his HP, though, and use Healer if necessary.
After you've viewed the scene in Vinheim before warping to Mithos' throne, the first time you complete the Advanced Class with a character they will be rewarded a unique weapon and title. Most of the character Coliseum titles give the same statistic bonuses of HP, Str, Def, Int, Eva, Acc: 40%, TP: 30%, however, Regal and Presea's have some differences. Regal's TP rate is 20% instead of 30% and Presea's base stats are 30% and TP at 20%, but she'll receive an equal title to the others coming up soon.
Lloyd: Valkyrie Saber, Sword of Swords
Colette: Angel's Halo, Super Girl
Genis: Final Player, Ultimate Kid
Kratos: Excalibur, Conqueror
Raine: Crystal Rod, Gladiator Queen
Sheena: Divine Judgment, Rose of Battle
Zelos: Excalibur, Grand Champion
Presea: Bahamut's Tear, Deadly Flower
Regal: Kaiser Greaves, King of the Coliseum
The Angel's Halo and Divine Judgment are the best weapons in the game for Colette and Sheena, however, the Tambourine and Money Bag are still viable with their +50 Luck. Lloyd's Valkyrie Saber has the opposite power of the Kusanagi Blade; having more thrust power and less slash, which is less useful, in my opinion, but depends on your play style. Kratos and Zelos' Excalibur may be misleading if you've played Tales of Destiny II/Eternia; in Symphonia, it's neither light-based nor does it regenerate your HP, making it vastly inferior to the Last Fencer. The Crystal Rod is great for Raine if you don't like the negatives of the Heart of Chaos or once you've maximized her Intelligence. The remainder of the weapons are outclassed and have no special effects.

If Kratos joined your party and you had Zelos defeat Seles in the Arena before he left your group, once you've been rewarded your prize, Seles will show up seeking revenge for her dead brother against the first character that completes the Advanced Class.
Seles is the exactly the same as when you fought her with Zelos. I refer you back to early
Chapter 21 for an in-depth strategy on dealing with her. With better equipment and higher levels, she is fairly simple now, but don't get cocky.
Victory nets you an additional Last Fencer, but more importantly, a second Elemental Circlet. You now have all the best headgear in the game for the ladies. I, personally, have Colette and Sheena equipped with the Elemental Circlets, Presea with the Magical Ribbon, and Raine has the Star Circlet. If Zelos is still in your party, and thus unable to to get a second Elemental Circlet, I keep the Magical Ribbon on Sheena and Maid's Hairband for Presea. The HP-regenerative Holy Circlet is not a bad idea, either.
Once you've completed the Single Advanced Class, the Party match option becomes available via the girl on the left of the sign-up counter. Only having two stages of difficulty, you'll fight with the first three members of your party. Take anyone you like along, but Raine will, obviously, be invaluable with the inability to use items. Also, you'll need for Lloyd to be in the lead of the party for the Advanced battle to obtain a title.
New Monsters at the Meltokio Coliseum (Party): Evil Teddy (Advanced)
The new Evil Teddy monster appears in the Advanced Class of the Party battles, but it doesn't possess a drop needed to complete its entry to the Monster List. At this point, you should have little problem with any of the battles in either the Beginner or Advanced classes; they are simply basic enemy encounters you would find anywhere else, however, the last battle of Advanced does contain a Dragon Knight and two spell casters, but with three characters, it's of no real concern. Also, if not bringing Raine, I would advise either equipping characters with the Krona Symbol, Poison Charm, or Yasakani Jewel, or at the very least setting Beef Stew for your after-battle recipe, as the Red Mantises in the third battle can, and will, easily poison you and it will linger into the following fights. Before attempting the Advanced Class, be aware that immediately after the conclusion you'll be challenged to an exhibition boss battle, where items are, surprisingly, allowed, so keep this in mind when choosing your characters for it.
Reward for the Beginner Class is 20,000 Gald and the usual Elixir, Miracle Bottle, Miracle Gel, Pineapple Gel, and Lemon Gel items. Advanced nets you 50,000 Gald and the Extreme Symbol accessory that boosts your Attack by +200, but lowers your Evasion by -99; I think that is a nice tradeoff, however, and complements Lloyd if you are going to stick with the underwhelming Material Blade, but I prefer to give it to Regal. The Extreme Symbol outperforms the Attack Ring in terms of power, in case you were curious. Also, if Lloyd was your on-screen character, at the conclusion of the Advanced Class, he'll obtain the title of Tactical Leader (Int, Eva, Acc: 50%, TP: 30%). Completing Advanced again after gets you the Beginner Class items with the usual 50,000 Gald.
As for the exhibition bout, I highly recommend a party of Lloyd, Raine, and Presea for it. Remember: Since items are usable, you'll need to bring Raine to use Magic Lens to complete the bosses' Monster List entries. With Raine and/or Genis, it is imperative that they have the Concentrate compound EX Skill equipped. Being a three versus three battle, you will be unable to consistently protect them from getting their spells interrupted and Raine will be heavily relied upon to keep everyone healthy. Presea and/or Regal should be using their Glory compound EX Skill, too. This is the second hardest battle in the game, so make sure you come prepared with Life/Flare/Guard Bottles, Miracle Gels, and Energy Tablets. Raine/Genis should have Blue Talismans, along with a Mystic Symbol equipped for accessories. Other characters should prepare to defend against fire and thunder magic, so loading up with the Star equipment, Flare Cape, Rare Helm, Thunder Cape, and the Reflect Ring are nice choices to bring.

Previous Tales series characters Garr, Farah, and Meredy have shown up for a cameo battle! Probably the most important information for this fight is that you're going to need to defeat one of these characters twice; when one falls, either Meredy will cast Resurrection or Garr will use a Life Bottle, but only once, so don't get discouraged. Meredy has the lowest HP and Defense, so I would recommend you put your focus on dropping her. When revived, thankfully, the resurrected character will only have a fraction of their maximum HP applied. Even with Raine, don't bother with any magic like Barrier; manually throw Guard Bottles on your characters and order Raine to consistently cast Nurse or Cure as you're going to be bombarded with consistent, heavy damage from all sides. If Raine lags behind, use Energy Tablets to stay afloat. If you brought Genis, he can devastate the entire battlefield by casting Meteor Storm; alternately, if you have Sheena, she can achieve the same effect summoning Maxwell.
When the battle begins, use a Flare Bottle on your main fighter and activate your Unison Attack on Meredy to begin the gauge refilling for a second use. In my experience, Farah always seems to target a character that is casting a spell, but with the Concentrate skill equipped, this should be of little consequence. Garr has seemingly ditched his impressive Void Sword skill from Tales of Destiny and launches volleys of arrows that are mostly an annoyance, but like Farah, can interrupt magic not protected by Concentrate. Meredy uses high-powered magic like Explosion, Cyclone, Indignation, AND even has Meteor Storm! You'll need to be nimble to avoid them and manually order characters to activate their Guardian skills. If you took my recommendation and brought Presea equipped with Glory, she'll be plowing over whomever she is targeting with no regard to their attacks at all! Overall, this is a battle of pure survival, but once the first character falls, twice, and you can gain a three versus two advantage, the battle becomes incredibly more easy. If you happen to lose, you can challenge them again.
Victory over the trio gains you a second Krona Symbol and the best armor in the game for both Lloyd and Genis: the Mumbane and Star Cloak. The Mumbane provides protection against earth, lightning, ice, and darkness elemental attacks with the usual fire protection for Genis' Star Cloak. We're now only one piece of equipment away from having all of the best in the game! To get it, we've got to face-off with Abyssion and the finale of the Devil's Arms quest. He's waiting at the bottom of the Temple of Darkness.
Preparations for this battle are largely fruitless; Abyssion is a master of physical attacks and quickly deploys nearly every type of element for magic. As such, don't bother switching around any equipment to try to get an elemental advantage at the expense of your physical defense. Even near level 100, the battle is likely to be long and grueling, so TP-reducing accessories such as the Faerie/Emerald Ring, or regen ones like the Turquoise, Yata Mirror, and Spirit Symbol are very nice to bring in addition to the Mystic Symbol for Raine, Genis, or Kratos/Zelos. Low Intelligence characters such as Lloyd and Colette should have the Resist Ring, or at least, a Rune Boots or the Diamond accessory. The Blue Talisman and Black Onyx could be considered, too.
Any party combination is fine, but Raine, as usual, is highly recommended. Her and Genis should continue to employ the Concentrate compound EX Skill along with Presea/Regal retaining Glory. Lloyd, Kratos/Zelos, and Sheena need the Lv3 EX Skill Guard Plus, at least. Lloyd should come with the Material Blade and Eternal Swordsman title to unleash Falcon's Crest. Coming prepared with the maximum amount of Life Bottles, Miracle Gels, Elixirs, and Energy Tablets you can carry is also a good idea. Genis cooking up Paella for a Unison assault near the battle's beginnings is smart, as well.

As you approach Abyssion waiting near Shadow's altar, you'll need to remove any Devil's Arm you may have equipped to proceed, so if Raine is using the Heart of Chaos, switch her to the Crystal Rod. Abyssion has tricked the party into recovering all of the Devil's Arms for him and is attempting to use them and the dreaded
Necronomicon to obtain the power of Nebilim! Who would have thought this guy had ulterior motives?

Abyssion is much like a freakish combination of both Farah and Meredy from the Coliseum, and you'll quickly find out why he's the hardest boss in the game. There's not a whole lot of strategy you can employ: he's gonna beat the tar out you incessantly and you just need to survive long enough to deplete his 120k HP by getting in combos when you can. Obviously, Presea and Regal with Glory, being unable to have their attacks interrupted, can work very well here to this point. Abyssion, I guess from the power of the Devil's Arms, uses all sorts of your own techs against you; with one of the worst being a copy of Colette's Ring Cyclone that will carve up anyone around him and comes out of nowhere. He's also got all of the magic Meredy had: including Meteor Storm! Thankfully, Abyssion is not stun-proof and if you manage to land sustained combos, you can interrupt his magic and keep him still for a bit. You may consider saving your Unison Attack for when he is surrounded by an aura of white (Like Raine in the screenshot) to attempt to knock him out of his casting of Meteor Storm if necessary. Otherwise, stay on your guard and always be prepared to Guardian, or try to evade, his magic.
Hopefully you brought Raine along, but this time I recommend, instead of casting Nurse/Cure over-and-over, to focus on buffering the party with Field Barrier/Permaguard and Acuteness/Keenness and reapply them once they expire (Colette's Holy Song, if she's in your party, as well). Use your Elixirs and Energy Tablets to keep the party healthy when she is in the middle of this (You won't need them in the bonus dungeon, for the most part). Without Raine, Flare/Guard Bottles can be used to a lesser effect. Also, don't forget to activate Lloyd's Falcon's Crest tech when his HP falls into red digits for huge damage! If you are below level 90, don't be surprised if you have to replay this battle a few times to overcome Abyssion's adversity. For the ultimate challenge, switch on Mania difficulty and try to take him down, but for masochists only, seriously!
Note: If you find yourself simply overwhelmed by Abyssion, you can always resort to using an All-Divide. While this lowers the damage sustained by both sides and largely prolongs the battle, your supply of items should allow you to outlast the demon in time.

When Abyssion is finally destroyed, he drops two unique items: The best armgear in the game for Lloyd and Presea, the Hyper Gauntlet, which besides great Defense, offers a small Accuracy bonus, too. Since Presea already has the fire-resistant Prism Guard, I prefer to give her the Hyper Gauntlet and move the Star Gauntlet to Lloyd, but you decide for yourself. The second item is the one-of-a-kind Jet Boots accessory, however, it's little more than an upgrade of the Elven Boots with more additional Defense. If Zelos is your party, with the acquisition of the Jet Boots, have him equip the Excalibur weapon, Golden Armor, Golden Helm, Blue Shield, and Jet Boots and complete a battle to be rewarded the Druaga-familiar title of Gilgamesh (HP, Str, Def: 80%, TP: 10%).
After the battle, Presea receives the title of Empty Soul (HP, Str, Def, Int, Eva, Acc: 40%, TP: 30) that is equal to the other character's Coliseum titles she lacked. In addition, besides freeing Presea from the temptation of Nebilim, Abyssion and the Necronomicon's destruction has also unleashed the full potential of the Devil's Arms. Starting from the beginning of the game, and carried over to a new game from the Grade Shop via the Battle Info selection, the game has been keeping track of each character's personal kill count; how these occurred is irrelevant: whether it be from a physical attack, magic, or tech. The Devil Arm's power, however, will not be reflected in the game's menu.
An example I think most can relate to the Devil's Arms is Vincent's Death Penalty weapon from Final Fantasy VII, but the kill count is tied to the character in Tales of Symphonia instead of the having to be killed by the weapon itself in the example of the Death Penalty. Also, unlike the Death Penalty, the Devil's Arms power caps at 5000 kills, so don't expect to see any 9999 hits under normal circumstances.
If you're looking for a place to best farm kills to increase the power of your Devil's Arms, try the beaches near Thoda Dock in Sylvarant. Encountering the large icons, they frequently produce the above enemy set of five monsters. Change your party's Strategy to "Hold Position" and butcher them up in anyway you see fit to raise your character's kill count and the power of their Devil's Arm weapon. Keep in mind: the enemy doesn't have to be defeated with the Devil's Arm equipped for its power to increase.
A single hit from Lloyd's Devil's Arm at the maximum 5000 kills. Obviously, WAY over the potential of any other weapon. This will obliterate anything in record time regardless of difficulty. Even a fraction of that power will be very useful in the bonus dungeon.
On your way out of the Temple of Darkness, the skit: "You Have Us" will become available, which is likely to be one of the last skits you will see. The game's optional dungeon is all that remains for us to conqueror. At the Academic Resources Building in Sybak, a book that stands out like a sore thumb has been lodged at the bottom of the bookcase near the upper-right corner. Having grabbed the Sacred Stone from Vinheim, Origin will warn the group that the dissidents of Niflheim are threatening to overtake the world from the cursed book. The only way to stop them is to enter the book ourselves and burn it from the inside with the Sacred Stone's "Soulfire", however, to do so is to literally put our very existence on the line and we need some preparations first.
Examine the book without the Sacred Stone to hear this rare Dwarven Vow from Lloyd!
The Forbidden Anamnesis, that the dungeon is referred to in the Monster
List, can either be incredibly easy or hard depending on the power of
your Devil's Arms and you'll need to adjust in accordance. Basically: if this if your first time playing, and the Devil's Arms lack significant power, you'll need to make preparations to survive, otherwise, you can jump right in. Reasons for this will be explained in the next section, but for the moment, I'll assume that you won't be using the Devil's Arms and offer the following advice.
- No matter what, Lloyd's Lv2 EX Skill, Personal, is an absolute must have!
- Bring 20/30 Holy AND Dark Bottles. Also, you can use Colette's Personal EX Skill to increase the duration of each Bottle's usage.
- Sheena's Personal skill is also valuable to have. The higher her Luck, the more likely you are to repel a monster icon and not engage in battle. If you can manage to get her Luck over 200 via equipment or inn manipulation, there will be no chance of being thrown into battle! Sheena's Money Bag weapon, Bridal Gloves, and Rabbit's Foot accessory can help reach this number.
- Maximize the ingredients needed for Miso Stew and Curry for Sheena to cook to restore HP/TP. Damage to these can come from sources other than battles!
- You can go with the Extreme Symbol, Attack Ring, or Warrior Symbol for added bonus to your attack power, but not completely necessary.
- Everything you encounter inside the cursed book will be randomized, so patience and multiple tries will likely be necessary until you become experienced with the dungeon.
Within the Forbidden Anamnesis is similar to the top floors of the Tower of Salvation that you climbed to rescue Colette. Each floor, which amounts to a total of 15 over three stratums, you begin on a random platform of a 3x3 grid, but the platforms may, or may not, be connected by bridges, also, advancement to the next floor is dependent on the color of the floor that is randomly drawn for you. You begin the dungeon with 100 Soulfire and, unless determined otherwise by a floor effect, this decreases with every step the player takes. It takes 10 Soulfire to fire the Sorcerer's Ring, and if at any time your Soulfire reaches 0, the game is over. More on increasing your Soulfire will be found below, but first, an overview of the types of floors you'll encounter in this astral plain.
Green Floor: This is the most-likely floor you'll encounter and the one you hope to get. You just need to find the warp tile hidden on one of the 3x3 platforms. Use a Holy Bottle and disregard the monsters if you don't wish to battle. Some monster groups will respawn when defeated, however, and this is predetermined when the floor is generated; if an icon doesn't regenerate after it is defeated, then it won't at all, on the other hand, if it does reappear, it will continue to do so infinitely providing for your best shot of leveling up in the game. More on this in a minute.
Blue Floor: This one is a total killer to your Soulfire. You have to use the Sorcerer's Ring, expending 10 Soulfire with each shot, to reveal a bridge to the next platform. Make absolutely sure you don't miss these shots or shoot when a monster is about to engage you in battle! Of course, the warp tile is randomly hidden on one of the platforms, so you have no choice but to waste your Soulfire to find it. Like the Green Floors, monster icons will sometimes respawn when defeated.
Red Floor: You'll need to defeat every single enemy on the floor to reveal the warp to the next level. Use a Dark Bottle to draw the monsters easily towards you so you don't waste valuable Soulfire trying to chase them down. If your Devil's Arms aren't powerful enough to end battles quickly, Red Floors can drain your Soulfire substantially.

Each time you advance to the next floor, you'll be randomly assigned either a positive or negative floor effect. These are: Gain/Lose HP/TP with each step, More EXP/Gald, increased drop rate from battles, no Soulfire is lost from moving, you may be fully healed, your Unison Attack gauge filled at the beginning of battle, your battle menu is inaccessible on the floor, or the option to prematurely exit the dungeon and return to Sybak is provided. You may also see the above screenshot message which will present you a floor challenge to increase your Soulfire. Unless you are desperate for Soulfire, I would highly advise against selecting any of those, however, forbidding menu usage can net you a +50 Soulfire bonus and is manageable. You can try the latter option for a +240 Soulfire increase, but if you land on a Red Floor; especially with someone like Raine or Genis, you're in a lot of trouble! If you choose to challenge a floor solo, make absolutely sure to equip the Krona Symbol or Yasakani Jewel to protect your status. If the Medusas manage to petrify your single character, it's a quick game over for you.
New Monsters within the Forbidden Anamnesis: Medusa, Arch Demon
Only two unique monsters appear in the Forbidden Anamnesis; both encountered from the undead icons and on any stratum, the Medusa and Arch Demon. They are often coupled with other undead enemies from Derris-Kharlan, but otherwise, not of much note unless you happen to land on a floor providing an earned EXP increase.

If you did happen to be lucky enough to receive the EXP floor bonus, and it's a green or blue version, with hopefully respawning undead icons able to produce this dungeon's unique monsters, you've found the absolute best place in the entire game to level up. You can just simply stand on top of the ever-respawning icons and fight without losing any Soulfire from movement. Not only do you get a large increase in EXP gained, but this floor effect also seems to negate the usual loss in EXP from being a higher level than the enemy. In the above screenshot, from an encounter of a Medusa, Samael, and two Doom Guards, is an average of the highest you will be able to obtain from basic monsters. Of course, depending on if you got an EXP modifier from the Grade Shop, the higher your technical smash, and your battle combo count, this amount can be further boosted. Not being able to easily exit the dungeon and save has always made me a bit hesitant to use this as a leveling spot, however, if you plan to make it to the maximum level of 250, you will not find a better alternative anywhere else. For a more in-depth look at getting to level 250, see the next chapter on completion notes.
Second Chance Monsters in the Forbidden Anamnesis: Arachnid, Skeleton, Wind Element, Melting Pot, Gargoyle, Green Roper, Float Dragon, Starfish, Octoslime, Living Sword, Grim Reaper, Specter, Evil Jelly, Giant Slug, Sea Horror, Cybit, Hammer Knuckle, Murder, Bomb Plant, Bomb Seedling, Evil Orchid, Mocking Plant
Besides the previously-mentioned undead, many of the game's older monsters reappear here; some of which are from now-inaccessible dungeons, giving you a second chance to complete their Monster List entries, if needed. Of particular note is the Bomb Plant that is the only way in the game to obtain the rare, basic Lavender item. Also, you can use the Living Swords to farm White Silvers and Murders for Metal Spheres if you don't want to waste your Grade to purchase them. Generally, the weaker the monster, on the earliest of the stratum it will appear, but not always, however, the Tower of Salvation (Before/After Welgaia) enemies only appear in the later parts of the third stratum.
Note: Despite the other monsters of the Tower of Mana showing up here, I have never encountered the Living Doll, and doubt you can. The giant Perfect Murder monster from the Tower of Salvation section after the escape from Welgaia is not here like his cohorts are, either. Also, even though all of the Summon Spirit dungeon monsters are represented here, those from the Triet Ruins are nowhere to be found, unfortunately.
Monster encounters aside, battles can make-or-break your Soulfire counts. If you choose to fight, it's incredibly important that you finish the battle as quick as possible. Basically, if you take over 20 seconds to finish a battle, you will get a small deduction to your Soulfire count; this deduction begins to increase in size the longer the battle goes. If under 20 seconds, you will get a Soulfire bonus; hence why the power of the Devil's Arms is necessary here. If your Devil's Arms aren't up to the task, use Holy Bottles and avoid every battle you can unless faced with a Red Floor and have no choice.

The most important part of the entire Forbidden Anamnesis are the braziers/torches that are randomly generated through all three types of colored floors. You'll need to blast them with the Sorcerer's Ring, which costs 10 Soulfire, in order to activate them, but you also gain 30 Soulfire with each brazier you set ablaze. This will be your primary source for Soulfire. It's worth it to explore the entirety of a floor for torches to pad your count.
When lit, the brazier's flame will glow either green, blue, or red, and be a varying degree of size. Inspecting the torch will reward the player with a bonus depending on the color and size of the flame. You CAN continue to shoot the brazier to grow the size of the blaze, and potential reward, however, I highly advise against this! Each additional time you shoot the torch, besides draining your Soulfire, it drastically adds the chance that when you inspect the torch you will receive a negative effect such as a small/large loss in Soulfire, HP/TP, or your battle menu being locked. Of course, there is the chance you will receive a positive effect, too, but trust me when I say it is not worth taking the risk.
Green Torch: The green variety of flames will provide your party with statistical bonuses for battle such as attack, defense, accuracy, ect. The larger the flame, the potential that you'll receive multiple bonuses. If you are on floor 10 or 15, these bonuses will carry over to the bosses that follow them. Occasionally, after receiving an effect, the green braziers will provide you a chance to escape from the dungeon and return to Sybak. Be VERY mindful of this possibility! The notification pops up immediately after confirming the previous dialogue box and it is very easy to accept and lose your progress by accident.
Blue Torch: Blue flames will either restore your party's HP, TP, both, or, with larger flames, you'll get a nice bonus to your Soulfire.
Red Torch: The red blazes are the Forbidden Anamnesis' bread-and-butter. Upon searching them, the game will pick from a large pool of items to place in your inventory. Rewarded item is not based upon a character's Luck, such as with Zelos'
Personal EX Skill, but is solely dependent on the size of the flame. The
brighter the fire, the higher quality of item you are likely to
receive. Most items gotten will be useless, but there are several of them that can only be found here if you can find a large enough flame!

The bad news is: your chance of getting anything worthwhile is very minuscule. VERY. All of the below items I have personally drawn from the red torches and can confirm except for the two I have noted. There is the possibility that there are even more to be found, but for now, these are the ones I know to be available to the player.
Notable Red Torch Items: Hourglass/EX Gem Max (See Note), Elixir, All-Divide, Memory Gem, White Silver, Mythril, Metal Sphere, White Quartz, Red Quartz, Energy Tablets, Spirit Bottle, Amulet, Elven Cape, Aqua Cape, Thunder Cape, Flare Cape, Rune Cape, Magic Ring, Defense Ring, Blue Talisman, Resist Ring, Blue Sephira, Holy Ring, Spirit Ring, Spirit Symbol, Holy Symbol, Attack Symbol, Spirit Bangle, Dark Seal
Note: I have never personally acquired an EX Gem Max here, but it has been confirmed by countless players. If I ever come across one, I will post the screenshot. I have gotten an Hourglass before on an earlier play, but could not find one on this current one to take a screenshot. If you picked Kratos over Zelos, this is the only way you can obtain Hourglasses now. In regards to the EX Gem Max: don't waste your time trying to find one. It is not an exaggeration when I say that you could pick the 10x EXP option from the Grade Shop and speed through the game to the final battles to pick up two EX Gem Max multiple times before you came close to finding even one from the torches.
As for other items in the pool, you've seen screenshots above of the White Quartz and Memory Gem items; both of which can only be infinitely acquired in this way. In fact, this is the only place in the game you can find a White Quartz besides Colette pilfering it from the Iubaris boss earlier on at the Tower of Mana. They are fairly common, as well.
Here you see the Resist Ring accessory found; otherwise a one-of-a-kind item. While outclassed by the Reflect Ring now, you can use a Rune Bottle on it to add additional Protect Rings to your inventory you cannot get any other way, also.
The game contains very few chances to collect the All-Divide item (Unless you farmed them from the Fakes) that have since passed. Thankfully, the potential is there for the red torches to produce one for you if you still need them.
The remainder of the items are more-easily obtained through other means; mostly customization, but worth mentioning for those curious. In closing, I'll say it again: don't waste your time trying to increase the size of the flame to get better quality items. It almost always ends badly and you will receive no item at all. Your chances are better to just take what is given to you and hope for the best.

Once you manage to clear the second stratum on level 10, the party will face-off with one of Niflheim's minions. Even without powered Devil's Arms, having already defeated Abyssion and the Coliseum special battle, the Hell Knight should present little problem. It'll charge around and slash and bash your characters physically while you try to keep up with its quick movements and corner it. It's weak against light, so Sheena can knock it senseless with Demon Seal if she's in your party. Of course, you can pound it with Colette and Raine's light-based magic like normal, too. The Hell Knight has some hefty HP, but is otherwise just a mini-boss with speed as its only major asset.
The Hell Knight drops the rare Force Ring accessory that can only be obtain here. Each time you leave/clear and replay through the Forbidden Anamnesis and defeat the respawning Hell Knight, you will receive another one. The Force Ring is, basically, the Protect Ring but without the drop in elemental resistance. I'm unsure what the exact parameter is of the Force Ring (It's not a battle effect like the Defense Ring), but it's unlikely to trump the Blue Talisman in terms of physical defense. However, this may not be the case if you are under-leveled as the Blue Talisman provides a straight +15% on top of your natural Defense. Later in levels, you'll find the Blue Talisman provides a substantial reduction compared to the Force Ring in battle.

Using a Rune Bottle on the Force Ring transmutes it into a Reflect Ring that protects against all of the elements in the game, and up until now, you could only have obtained one of these. If you haven't already, make sure Presea has one equipped to make up for her Prism Guard armor that contains a weakness against darkness-based attacks.
The final floor of the dungeon is number 15, located on the third stratum. In order to challenge the concluding boss, you need to step into the warp with a set amount of Soulfire, of which I'm unsure what the exact amount is, but I would wager it is at least 700 or a little higher. If you don't have the required amount, you'll simply be sent back to Sybak to retry the dungeon, but at least it's not a game over!
Meeting the required amount of Soulfire sets you against the monstrous Living Armor, the final monster in the game. Like the Hell Knight, this thing has a massive amount of HP, so expect a long battle without sufficient Devil's Arms. While not particularly challenging, the Living Armor does put up a decent fight. He has absolutely zero wait time for spell casting, but only employs middle-level spells like Dreaded Wave, Atlas, and Earth Bite. Unfortunately, because he is an immovable punching bag, he directs these area spells in the middle of your fighters who are standing at his feet, or even more likely, at a character casting a spell, so don't think you'll get away without healing. Besides this, it'll knock characters away with its giant sword causing above-average damage. Whittle down this tank's HP and you'll have completed the Monster List and the Forbidden Anamnesis. Expect a massive amount of EXP, too!

Foiling Niflheim's plans rewards Lloyd and his party with the one-of-a-kind Persian Boots accessory, the final item in the game! Unlike the Force Ring, this is not a dropped item, but is gained through an event, so you cannot obtain more than one by challenging the Living Armor again. The Persian Boots are a combination of the Force and Reflect Ring accessories; providing protection against all elements and additional physical defense. I always give this to Lloyd, but just about any character can benefit. Choose wisely!
The party will begin to fade away within the book and Lloyd is given the option to either use the Soulfire to burn the cursed book, or decline and you can replay the dungeon again. Absolutely DO NOT burn the book with the Soulfire! There is no reward for this and you will permanently lose access to the dungeon. Besides a quote from Kratos (Or Zelos?), there is nothing achieved by burning the book; no skit or even a follow-up with the guy who told you about the book in Heimdall. Keep the book intact so you can farm Force Rings, items from the Red Torches, or take advantage of the bonus EXP effect.

Having defeated the Living Armor, if you've been following my guide all the way, your Monster List should be completely filled. Take the Rheairds back to Sylvarant and search around for Nova's Caravan that shifts locations around the world (Check the desert around Triet first). With all 251 entries in the Monster List (Having used a Magic Lens is not a factor), Nova will give Raine the title of Monster Collector (Int: 100%, TP: 30%).
Note: Keep in mind that it is impossible to obtain this title in just one play. Depending on whether Zelos or Kratos joined your party, there is a different boss to fight for each one, so taking both paths in two different plays is required. See
Chapter 22.
Assuming that you've created the Amulet accessory from Dirk's customization shop and the Elven Cape one from Altessa's, the Persian Boots should have been the final item added to your Collector's Book. Return to Hokonesia Peak and speak with Koton to have him reward Genis the title of Item Collector (HP, Str: 100%).
Note: Like with the previous title, you cannot obtain this one either in just one play; three are actually required. This is due to three different items being possible from Colette, Zelos, and Kratos during the Flanoir "soulmate" events. See
Chapter 21.

Two elusive titles I haven't covered belong to Lloyd and require combos of
60 and 100; the latter of which is no easy task. Thankfully, with some trickery, they are achievable. First, Lloyd must be a member of the battle party that
performs the combo to receive the titles. Second, form a party of Lloyd,
Raine, Genis, and Kratos/Zelos. We need both Raine and Genis on the
Technical-side of the T/S line so that they can cast Ray and Cyclone,
respectively; Lloyd and Kratos/Zelos skill set is not that important,
although Lloyd will benefit more from the Technical-end, too, with Sword
Rain: Beta, but you can use Raining Tiger Blade, as well. You'll need
three Hourglasses, also. If you don't have any Hourglasses and Zelos
is not in your party to obtain them, you'll have to do this the hard way on the Living Armor in the bonus dungeon and hope
for the best as it is likely the only monster that has enough HP to
withstand such a combo without Hourglasses.
Set your party's Strategy to "Hold Position" and your Unison Attack as Sword Rain: Beta/Raining Tiger Blade, Ray, Cyclone, and Air Thrust. Make your way to the Earth Temple and find the gigantic Earth Dragon there. Begin the battle and run in with Lloyd and perform a basic combo and then Sword Rain: Beta or Raining Tiger Blade; this will result in well-over 10 hits. As soon as the last hit of Lloyd's tech connects, have one of the other three characters use an Hourglass. Repeat the tech as Lloyd, then immediately use another Hourglass. Continue this until you have at least 40 hits, then before the final Hourglass expires, activation your Unison Attack. Use: Lloyd, Genis, Kratos/Zelos, then lastly, Raine to trigger the special attack Prism Stars between the two siblings. This combination should easily place you over 100 hits. The first combo of at least 60 will reward Lloyd the title of Combo Expert (HP, Str: 60%, TP, Acc: 20%). For a combo of 100, Lloyd will gain the title of Combo Master (Acc: 100%, TP: 50%).
There are many ways these combos can be achieved, but I have always had the most success with this way. Colette can replace Kratos/Zelos and use Stardust Cross for some additional hits, too, if preferred. Hopefully you don't have to resort to attempting this without Hourglasses on the Living Armor at the bottom of the Forbidden Anmnesis. If so, you'll need a bit of luck on your side, as well. Equip all four characters with the Personal and Taunt EX Skills to create the L. Unison compound skill. L. Unison gives the party a chance to automatically refill their Unison Attack gauge after use. Begin the battle by focusing Cyclone on the boss with Genis, then run in and perform a basic combo and Sword Rain: Beta or Raining Tiger Blade with Lloyd. As soon as Cyclone is finished, activate your Unison Attack that ends in Prism Stars. This won't result in 100 hits, but if L. Unison activates, you can immediately trigger another Unison Attack and this should put you over the 100 mark. It's frustrating, but doable.

Next, let's talk the character-specific recipe titles. Once a character has mastered all of the game's recipes, indicated by the number of golden stars that is different for each character and recipe, put that character into the lead of your party and head for the third floor restaurant in Altamira. You'll see the Wonder Chef in a small window in the corner of the restaurant, seen in the screenshot above, and talking to him will reward that character a title. Each title contains the same bonuses of Def, Eva: 50%, Int: 40%.
Lloyd: Gourmet King
Colette: Charismatic Chef
Genis: Little Chef
Kratos: Gourmet Master
Raine: Passable Chef?
Sheena: Master Cook
Zelos: Gourmet Prince
Presea: Master Chef
Regal: True Chef
For ingredient needs, go by the Academy cafeteria in Sybak and purchase the different-colored Satay from Katz' Village for everything you need. The only items not available there are Juicy Meat and Beef Strips that you can find in Asgard, and the Amango and Kirima fruits you get from the trees in Latheon Gorge, but you can substitute other items for those when cooking. Go someplace with quick, easy battles, such as the Iselia Forest, and cook until you need to make another trip to gather up the ingredients again.

Most likely, the last thing you will do as a player will be to complete the monotonous Figurine Book. The easiest way to fill this thing out is to start completely from scratch. Taking Pellet items to Dirk has him, for the most part, randomly create character figurines based upon the number and types of the Pellets handed over. There are a total of 288 figurines, and if you start from nothing, it's easier to figure out how many Pellets in total you need to create them all. If you carried over your Figurine Book data incomplete, it's not a huge deal, but you'll have to do a lot of trial-and-error to finish it. Thankfully, Dirk cannot create a figure twice, so as long as you keep giving him different Pellet types, he'll eventually create all of the figurines for you. Below are, in my opinion, the best spots in the game to farm the various types of Pellets necessary.
Pellets: Jellyfish in the Meltokio Sewers have these to drop and steal. You'll sometimes get Fine Pellets as a drop, too.
Fine Pellets: Gold Slimes at the Temple of Lightning carry these for steal and drop.
Super Pellets: Lobos inside the Temple of Ice can have these pilfered and dropped. You can find duos of these commonly, also.
Rare Pellets: Colette has to steal these from the Phantom Knight in the lower-levels of Derris-Kharlan. Samaels, that usually accompany Phantom Knights, can cough up Fine Pellets when defeated, as well.
Note that not all of the figurines are available to create until you view the final scene before warping to Mithos' throne in Vinheim. This may not apply on a new game +, however. Unfortunately, there is no real science to how Dirk creates; it's rather random, so it's nearly impossible to predict how many types of Pellets you will eventually need. If you start from a blank slate, collect 20 of the basic, Fine, and Super Pellets and take them to Dirk. Repeat this three times. Next, collect 20 basic Pellet and Rare Pellets and hand them over to Dirk. Follow that up with 20 Fine and Rare Pellets. Then, 20 Super and Rare Pellets together, twice. After this, if you're lucky, your Figurine Book should be at least 80% complete. Doing one last run of 20 of each type of Pellets should complete the list for you. If not, do a run of another 5 or 10 Pellets types. Like mentioned, Dirk creates a seemingly random number of figures, so it isn't possible to know how many of each type you will eventually need, but this will give you a general idea of the extent of things. When you've finally managed to create all 288 figurines, return to Asgard and talk to the half-elf Harley who is living in the eastern-wing of the city. Show him the completed Book and he'll give Genis the title of Figurine Collector (Str, Def: 100%).
The final thing I want to close with is some basic information on how to go about farming items to create the accessories in Dirk and Altessa's customization shops. Below I will list, in my opinion, the best places in the game to pick up the items necessary to create any of the items they have available to customize. Remember: you can use Colette's compound EX Skills Item Finder (Tough, Sharp-eyed) and Item Getter (Sharp-eyed, Magical, Lucky, Stat Boost) to drastically increase your chances.
- Black Quartz: You can dice-up the Zombies in the Martle Temple for these, or for more EXP, look for the Doom Guards in the early stages of Derris-Kharlan.
- Aqua Quartz: Seahorses drop these on the beaches around Tethe'alla.
- Blue Quartz: Ice Warriors at the Temple of Ice have them for steal/drop.
- Red Quartz: Use a Rune Bottle on a Blue Quartz.
- Yellow Quartz: Earth Elements inside the Temple of Earth carry them for steal/drop.
- Green Quartz: Use a Rune Bottle on a Yellow Quartz or Harpies on the grassy plains outside Asgard occasionally will drop them.
- Purple Quartz: Lightning Birds can drop them in the Temple of Lightning.
- Rune Bottle: Chimaeras in the Fooji Mountains have these to steal and drop, but if Zelos is in your party, you can get these from talking to the ladies with his Personal EX Skill equipped.
- Spirit Bangle, Heal, Stun Bracelet, Moonstone, Black Onyx: Bought from the accessory shop in Flanoir.
- Poison, Drain, Stone, Paralysis, Stun Charm, Thief's Cape: Bought from the armor shop in Altamira.
- Leather Boots: These were actually missable back in Palmacosta. Unfortunately, there is no way to get them after the city is destroyed.
- Mythril, White Silver: Exchange Grade for at the material shop in Flanoir.
- Brass: Thunder Swords in the Temple of Lightning carry these for steal/drop.
- Black Silver: Phantoms in the Gaoracchia Forest will drop them.
- Magical Cloth: Rogues found on the roads outside of Meltokio drop them.
- Beast Hide: Bears on the Ossa Trail have these to steal and drop.
- Life, Flare, Guard, Holy, Dark Bottles: Buy from the item store in Altamira.
- Energy Tablets: Red Bats in the Toize Valley Mine have these to steal. Zelos can commonly get these using his Personal EX Skill, too.
- Elixir: Win from completing any of the battle ranks at the Meltokio Coliseum.
Other items you can customize there, but are easily obtained elsewhere, are the Water Spider you can still purchase in Mizuho, you can create Blue Talismans easily by purchasing basic Talismans in Flanoir and using a Rune Bottle on them, and Blue Sephiras can be created from basic Sephiras with a Rune Bottle, as well.
This brings my Tales of Symphonia completionists guide to a close. It took me over half a year to finish this thing and I greatly appreciate you following along with me on this journey. Like always, feel free to contact me with any questions, comments, or anything else you may need. I hope you see you on my next project. Thank you!